There’s something magical about the combination of rich duck meat and Thai red curry! This duck curry recipe features duck breast with golden skin served in a coconut red curry sauce. Add lychees or pineapples for a very special dish that’s to die for!

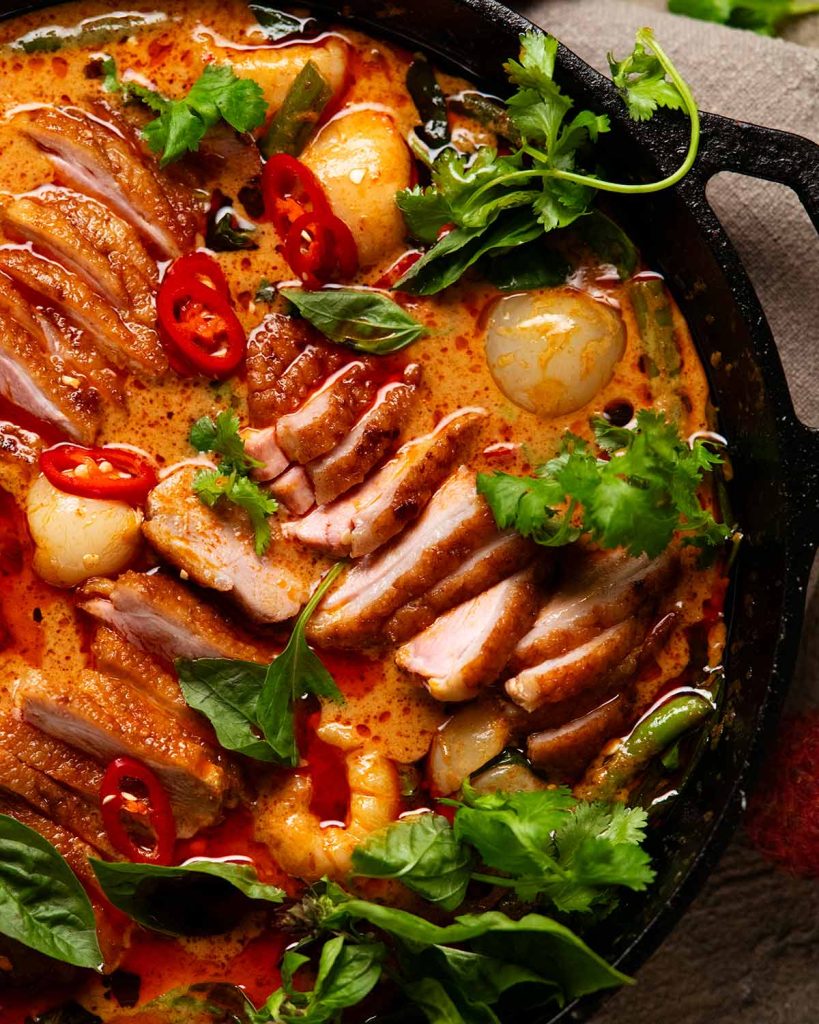
* THAT IS NOT A PRAWN/SHRIMP in the photo! It’s the hole in a lychee where the seed was removed! 😂 *
Thai red duck curry
I recently enjoyed a beautiful Thai red duck curry at one of my favourite Thai restaurants here in Sydney, Khao Pla in Chatswood, and it inspired me to make my own. The rich flavour of duck meat, with the red curry sauce, the burst of sweet juice from the lychees and freshness from the herbs is one of those eating experiences that I hope everyone tries at least once in their life!
Plus, as much as I love my reliable Chicken Red Curry, duck is special. I’ve always thought of it as a luxury item and I love that duck meat is more readily accessible at grocery store these days. While it is more expensive than chicken, making Duck Curry at home costs, by rough calculations, around 70% cheaper than at a nice Thai restaurant where small bowl can fetch upwards of $30.


Ingredients in Thai Red Duck Curry
Here’s what you need to make duck curry. This recipe calls for 3 duck breasts totalling 500g/1 lb which makes enough curry to serve 4 to 5 people.
1. Duck breast
I’ve eaten and seen duck curry recipes made with all sorts of cuts – whole duck, Marylands (thigh and bone) and breast. Some recipe start with a cooked Chinese BBQ duck while others use a confit method, and some steam/roast/then fry the duck.
I’ve opted for duck breast – easy to cook, relatively easy to get and because I like biting into the rich tender slices of duck smothered in the curry sauce.

Where to find duck breast – These days in Australia it’s fairly common at large grocery stores as well as fresh produce stores and butchers. Look for skin on boneless breast. It costs more than chicken (~$18 for 500g / 1 lb), but it’s special! A luxury product reserved for Thai royalty! (So I’m told by a Thai chef who helped out at RTM a couple of weeks ago 😊)
See FAQ for other duck cuts I have seen used, and why I didn’t opt for them for this recipe.
2. Lychees or pineapples!
To me, lychees are extra special because the season is so fleeting and I love how the pearly white balls look against the red curry. However, I would never hesitate to use pineapple instead – preferably fresh, else canned.
And – tip for you – Asian branded lychees are actually very, very good! I was taken by surprise.


3. thai red curry sauce
You can use homemade red curry paste or store bought, which is what I’ve opted for. If using homemade, you will need a little extra fish sauce (because store bought is well seasoned already).

- Red curry paste – It’s pretty well document on this website: Maesri is my preferred! Cheapest and most authentic flavour of brands you can find at (most) grocery stores without digging in the dark corners of Asian stores. I also like that one can(115g / 1/2 cup) is the perfect amount to make a curry using 1 can of coconut milk.
Find it at large grocery stores here in Australia (Coles, Woolies, Harris Farms) and in Asian stores (it’s a staple item).

- Garlic and ginger – Adding these gives the store bought curry paste a freshness boost to make it more like homemade red curry paste. It really makes a difference! (Note: ordinarily I use lemongrass but I didn’t feel it added much in duck curry because duck meat is richer in flavour than chicken. So I ended up taking it out of the ingredients.)
- Coconut milk – Not all coconut milk is created equal! Good ones are made with 85%+ coconut so have better flavour. Economical ones are diluted with water. Ayam is my default (89% coconut). Full fat please! Low fat is thinner and has less coconut flavour.
- Makrut lime leaves – For authentic Thai curry flavour! Imparts a special earthy/herby fresh lime flavour into sauces. Fairly accessible these days at large grocery stores and Asian stores. They freeze 100% perfectly which is handy. (Note: formerly known as kaffir lime leaves. The name has been changed due to racial associations.) See FAQ for uses for leftover lime leaves. Can’t find fresh? Still worth making with dried! Though it is worth making a bit of effort to find fresh.
- Fish sauce – This is used as the salt in red curry. More flavour than plain salt!
- Sugar – For the right touch of sweetness you find in red curry sauce.
4. herbs and beans
Thai basil is the classic herb used for Thai cooking, but you can substitute with regular basil. The beans can also be substituted with other vegetables – I chose it for colour and shape.

- Red chilli – For optional garnish. Use large ones for less heat and small Birds Eye or Thai Chillis if you are a spice monster (or claim you are).
- Thai basil – A classic fresh herb used in Thai cooking, it tastes like regular basil with a slightly stronger aniseed and slightly minty flavour. Nowadays it’s fairly widely available in Australia in large grocery stores and green grocers (Coles, Woolies, Harris Farms), but much better value in Asian stores! Substitute with regular basil (I have done so and it’s still company worthy).
- Coriander/cilantro – For garnish, Not vital!
- Green beans – I chose this as I thought the green colour would look nice in the red sauce. Snake beans (Asian long beans) are also on point, though actually, you can use any vegetable you want that you think will work with red curry sauce. Cherry tomatoes seems common but I feel like with lychees, it’s a lot of same-same shiny balls floating in one dish!

How to make Thai Red Duck Curry
This duck curry recipe is actually very straightforward and has a nice workflow to it. Once you start cooking, you can have it on the table in 30 minutes:
- Duck breast – pan seared to render the fat and crisp the skin (10 minutes), finished in the oven (8 minutes) then rested (5 minutes) before slicing.
- Red curry sauce – prep the ingredients while the duck is in the pan (it’s hands off), then start the sauce and have it simmering while the duck is in the oven.
- Serve – the sauce and duck should be ready around the same time, ready to plate up and serve!
1. cooking the duck breast
Both duck and chicken are poultry, but duck is structurally different. Because of this, duck breast cooked to medium rare is like a beautiful steak – tender, rich and juicy. On the other hand, we would never eat chicken breast medium rare. Chewy! Rubbery!
Note: full duck breast cooking explanations got lengthy, so I moved it to a separate post. I figure it will be handy for future use! See How to Cook Duck Breast.

- Slash skin – Use a sharp knife to make 5 to 6 diagonal slashes across the skin of the duck, taking care not to cut into the pink flesh. Don’t cut from edge-to-edge, you want the skin to stay in one piece but just make slashes in the middle.
Then pat the skin dry with paper towels and sprinkle salt and pepper on both sides.
- COLD pan with NO OIL – Don’t turn the stove on yet. Place the duck skin side down in an unheated oven-proof pan without any oil. The pan can be cast iron, non-stick, or a regular pan.

- Weigh down for flat skin – Place another pan on top of the duck to weigh it down, not a cast iron one though, it’s a little too heavy. This is to prevent the skin from curling and wrinkling.
- Cook on low 10 minutes – Now you can turn the stove on! Low if it’s a strong stove, or medium low if it’s a weak burner. The more slowly you cook the duck, the more fat you will render out which means crispier skin. It’s low maintenance too, because it’s low heat.

- Fat starts to render – After a few minutes, take a peek and you’ll see fat has started to melt out of the duck.
- So much duck fat! At around the 5 to 7 minute mark, the entire pan will be covered in duck fat.
Keep the pan weight on until around the 7 minute mark when the skin has started to go golden and has “set”. While it is still soft, it can still wrinkle/curl = rubbery patches = 😭

- Golden crispy skin! Keep cooking until the skin because golden and crispy, around the 10 minute mark, or longer. You can turn the heat up towards the end, once there’s lots of fat in the pan.
- Finish in oven – When the skin is golden, turn and cook the flesh side for just 1 minute to seal. Then transfer the pan to at 180°C/350°F oven (160°C fan-forced) and roast for 8 minutes or until the internal temperature is 60°C/140°F which is medium ie. light blush of pink. For medium rare (deep pink, like steak), aim for 54°C/130°F (6 minutes).
Don’t worry if you go over, duck breast is great even fully cooked to 68°C/154.4°F (ie no pink at all, like chicken breast). Think – Chinese BBQ duck. Fully cooked, and delicious!

- Rest – Then place the duck on a rack set over a plate, or just a plate, and leave it uncovered to rest for at least 5 minutes while you finish the sauce.
- Slice the duck breast just shy of 5mm / 0.2″ thick. Do this just before placing it in the curry sauce. It can rest for well beyond 5 minutes because the flesh warms up once placed in the hot sauce.
2. red curry sauce
The key step here is to cook off the curry paste, whether using homemade or store bought. It makes a massive difference to improve flavour. If you just stir it into liquid, the flavour is so unimpressive!

- Cook off curry paste – Sauté the curry paste with the ginger and garlic for 4 to 5 minutes over medium heat. The curry paste will be quite wet at first but will dry out and deepen in colour which improves the flavour of the curry sauce.
- Sauce – Add the chicken stock first and simmer to reduce by half. Then add the coconut milk, fish sauce, sugar and lime leaves (crush in hands to release flavour). Stir to combine then simmer for 2 minutes.

- Green beans (or other veg) – Add the beans and simmer for 3 minutes until they are just about tender. (If using other vegetables, add them in based on the cook time).
- Lychees or pineapples – Then stir the lychees or pineapple in and simmer for just 1 minute just to warm it though rather than cook it until soft. And just before serving, stir the Thai Basil leaves in (it wilts quickly and, like regular basil, darkens in colour with prolonged exposure to heat).

- Plating up – Though we’re not aiming for super crispy duck skin in this dish, I still like to serve it with most of the skin above the sauce line because it gets less soggy than stirring it though. Visual purpose as well.
So I put a bit of sauce in the base of a serving bowl then lay the duck breast on top, fanning the slices out slightly to expose the pretty pink flesh. Then I spoon the rest of the curry sauce, lychees etc around the duck breast. Or, I gently place the sliced duck into the pan with the sauce in it, as pictured below.
- Garnishes and serve! As with many South East Asian dishes, garnishes not only add lovely colour but also extra flavour! Extra Thai basil, coriander/cilantro and slices of red chilli.

Look at it. It’s so beautiful! A riot of colour, the unmissable pearly balls for lychees, the golden duck skin peeking out above the red coconut curry sauce, and the hint of pink flesh on show which screams “I’m so tender and juicy, no dry duck here!!”.
Take it to the table with pride along with jasmine rice that you steamed earlier (despite a certain food blogger not including that instruction as step 1). Gesture grandly* and stand back for a moment to give your audience time to praise and lavish you with exclamations of appreciation before graciously allowing people to dig in! –