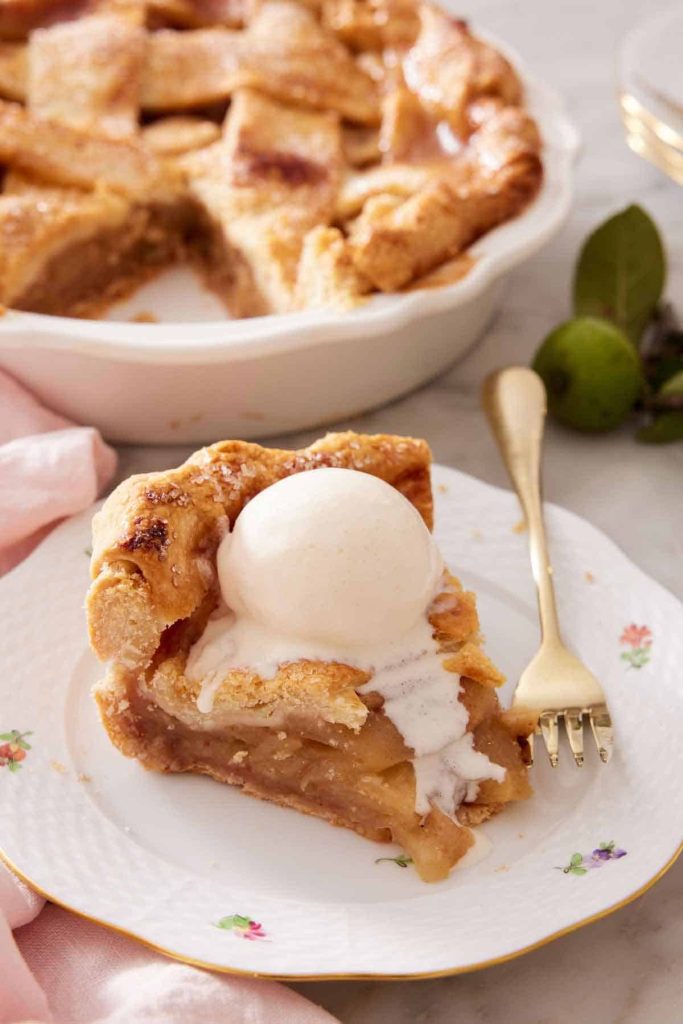
Few desserts say “fall in every bite” quite like this apple pie recipe. The perfect blend of tart and sweet flavor from an abundance of fresh apples, this easy apple pie is a classic dessert to complete any holiday spread!
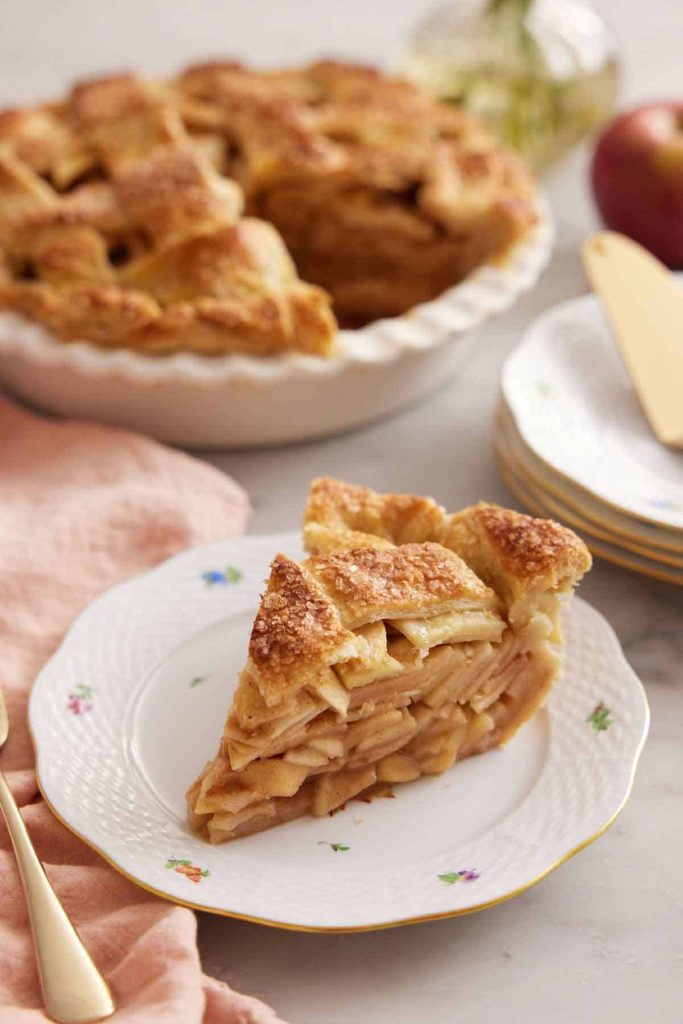
A flaky, buttery pie crust generously filled with gently spiced apples alongside a big scoop of vanilla ice cream- it doesn’t get much more delicious than that. And this apple pie recipe is a festive, easy holiday dessert that’s perfect for fall!
Apple pie is an iconic American dessert. It’s ubiquitous on almost every holiday table because it is simply that popular, so much so that many families have their own take on an apple pie recipe.
My recipe for apple pie is a favorite in our family, and it isn’t difficult to put together (no, you do not need any canned apple pie filling either). One of the best things about this apple pie recipe is that it is packed with an abundance of crisp, fragrant fresh apples.
What You Need to Make This Recipe
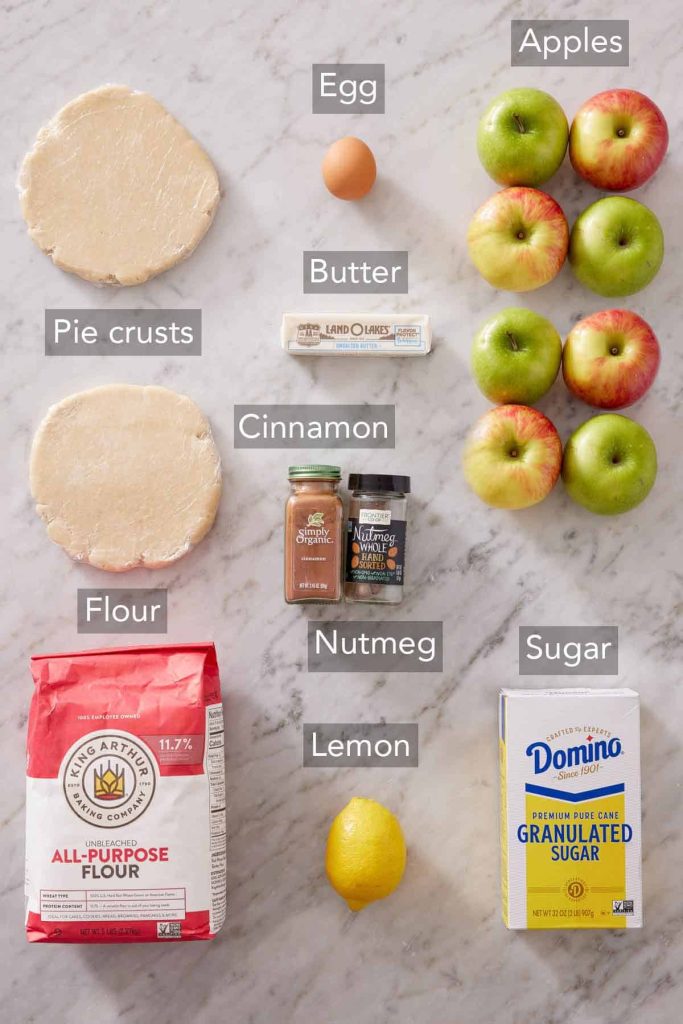
Apples — peel, core, and thinly slice the apples. I used a mixture of Granny Smith apples, Honeycrisp apples, and Fuji apples for the perfect balance of tart and sweet.
Spices and more — to give your apple pie recipe that classic autumnal flavor, first stop the oxidizing process by tossing them with lemon juice, then flavor the apple slices with granulated sugar, cinnamon, and nutmeg. You can swap some of the sugar for brown sugar if you want a richer filling.
Pie dough — you’ll need one 9-inch double-crust pie dough. But if you want to save time, store-bought pie crust or pie dough works as well.
Butter — dice up 2 tablespoons of unsalted butter to dot the top of the filling before baking the pie. This adds so much richness and sublime buttery goodness to the pie filling.
How to Make This Apple Pie Recipe
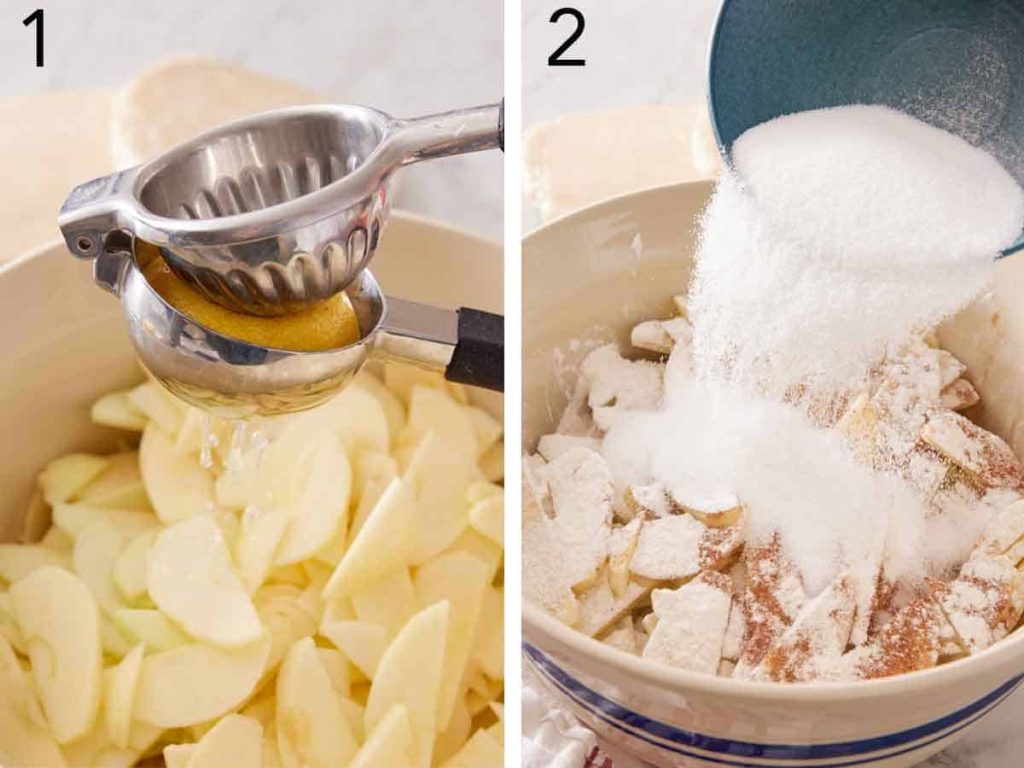
1. Pour fresh lemon juice over the apple slices and toss well to stop them from oxidizing (turning brown).
2. Add granulated sugar, flour, cinnamon, and nutmeg. Stir so the apples are well coated.
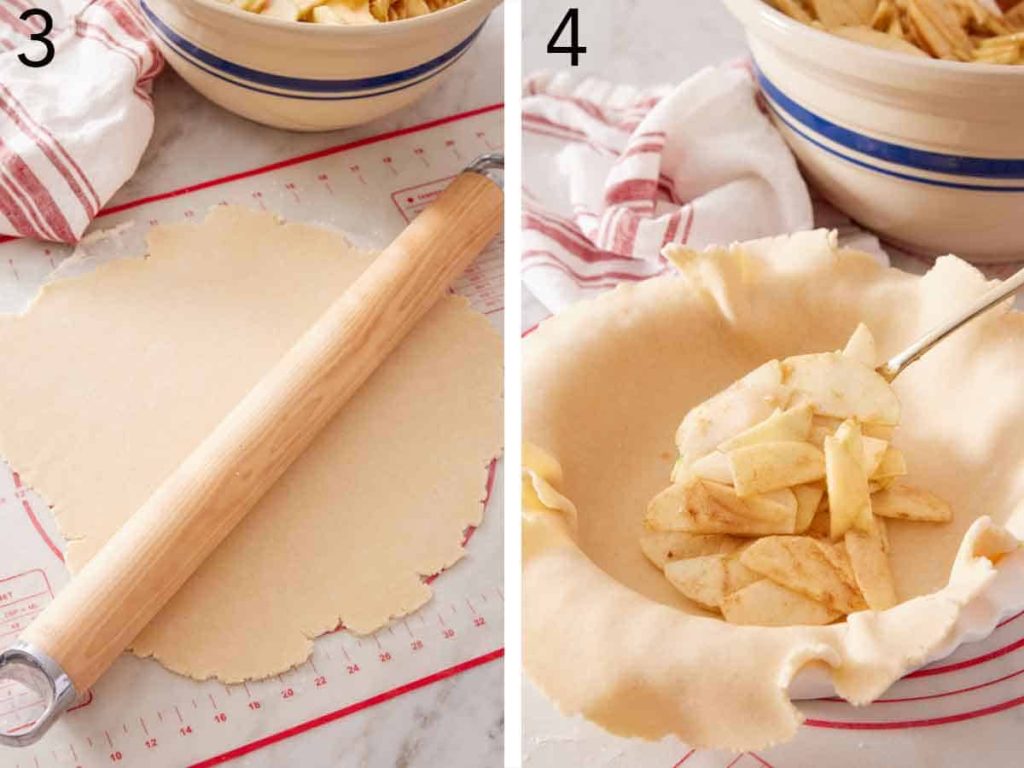
3. Lightly flour a clean surface in your kitchen and roll one disc of pie dough into a 12- to 14-inch circle. Grab a 9-inch pie dish and line it with the dough. Let the excess hang over the edge.
4. Spoon the apple pie filling into the bottom crust (be generous!) and pat it gently into an even layer, allowing a slight mound to form in the center.
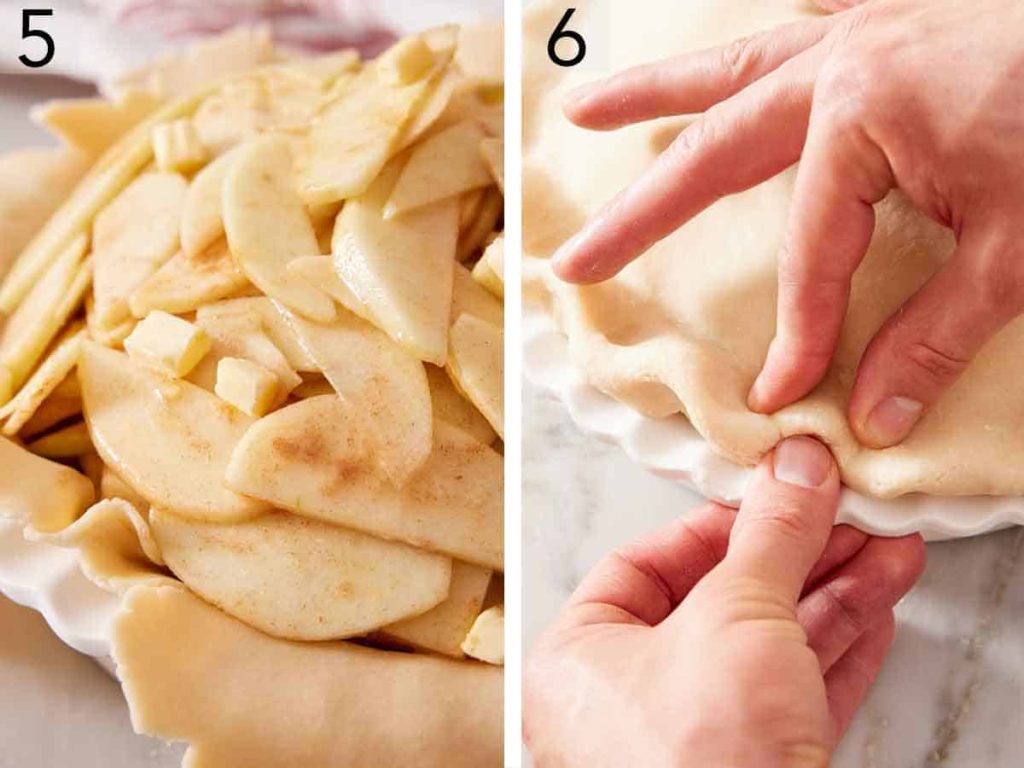
5. Dot the filling with cubed unsalted butter.
6. Roll the other disc of pie dough until it’s about ⅛-inch thick (a circle approximately 11 inches in diameter). Place the dough atop the filling. Trim the excess pie dough to an inch or so from the edge of the pie pan, tuck the excess under, and crimp the edges.
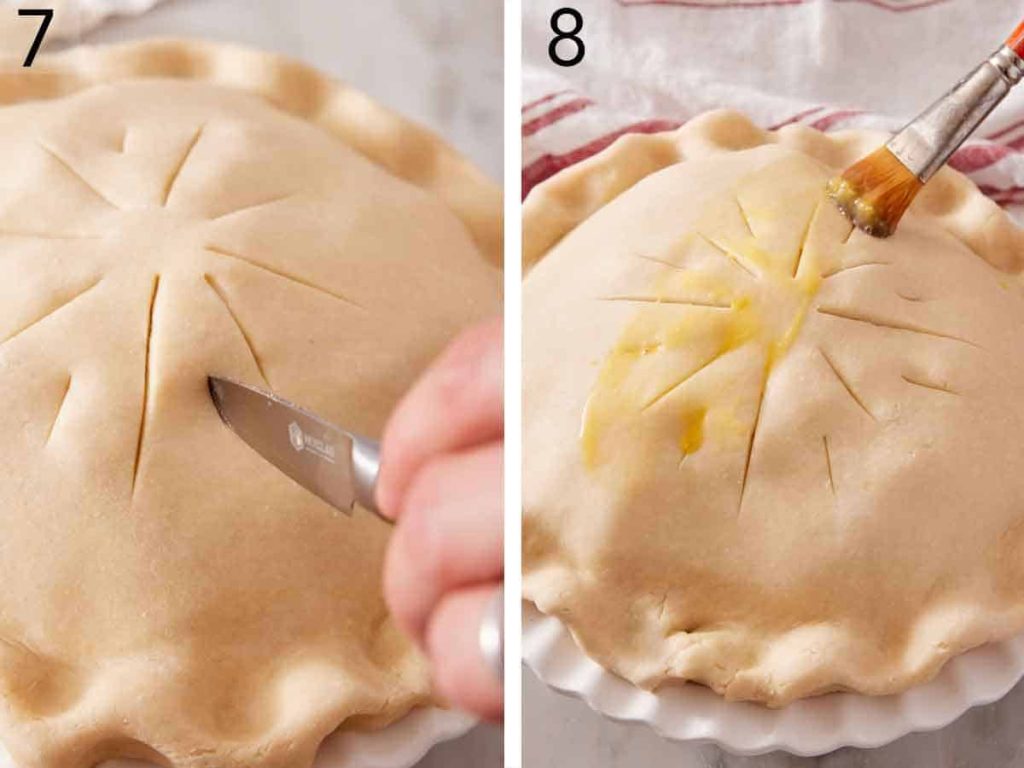
7. Cut slits in the top crust to allow steam to escape as the pie bakes.
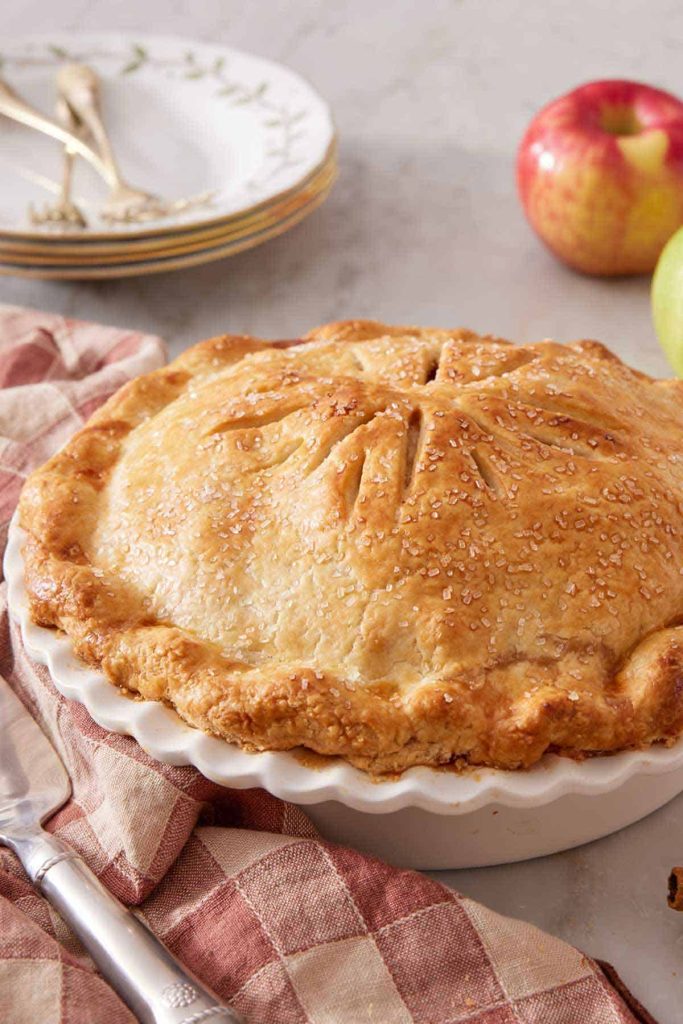
8. Brush the pie crust with the egg wash. Place the pie dish on a rimmed baking sheet lined with either parchment paper or foil to make clean-up easier. Bake in a 425°F heated oven for 20 minutes before reducing the heat to 375°F. Bake for approximately 50 minutes to an hour more, until the crust is a beautiful golden brown and the apple pie filling is bubbly. Allow the pie to cool completely on a wire rack, which will take about 4 hours. Slice and enjoy!
Pro Tips for Making This Recipe
Choose a mixture of tart apples and sweet apples. Granny Smith apples are arguably the best apples for apple pie and with good reason. They are tart, firm, and hold their texture well after being baked. I balance the tartness with sweet Honeycrisp and Fuji apples. You can also use Golden Delicious apples, Jonagold apples, Pink Lady apples, Braeburn apples, or Mutsu apples for this homemade apple pie filling recipe. Choose your favorites, and it will be delicious!
Peel the apples. This might seem like a small thing, but peeling the apples makes a difference in how your apple pie will taste! Some apple skins are tart or chalky, and they are typically coated in wax, which can have a bitter flavor, so don’t skip this step.
Get creative with the top crust. In this apple pie recipe, I sometimes use a solid top crust with a few slits cut into it to allow steam to escape. Other times I like to use a lattice crust instead for a more striking presentation. A lattice top helps excess moisture escape effectively as well. Another alternative is to crimp the edge of the bottom crust and then use pie crust cutters or cookie cutters to create beautiful shapes with the top layer of dough. Place those dough cutouts on top to cover the filling.
Sprinkle some sugar over the top of the pie crust. A sprinkle of turbinado sugar or granulated sugar will give this pie recipe a slightly crunchy topping, adding some textural interest and a little extra sweetness.
Prevent the crust from browning too much. A common issue with baking pies is that the crust browns too fast, especially the edges. If you notice that your crust is gaining too much color too fast, cover the top of the pie loosely with foil. Or, if it’s only the edges that are browning too quickly, cover just the edges with foil.
For picture-perfect cuts, slice the apple pie after refrigerating. A cold pie is so much easier to slice neatly! You can always heat up each slice if you want to enjoy it warm.
Frequently Asked Questions
Can I make it ahead of time?
Yes! Convenient for the hectic holiday season, this apple pie recipe can be made ahead. Simply bake the pie, allow it to cool completely (this will take a few hours), wrap it well with plastic wrap, and refrigerate for up to two days. Slice it while it’s still cold before letting it come to room temperature and serving.
How do I store leftovers?
To store leftover apple pie, wrap it with plastic wrap and refrigerate. It will keep for up to 5 days.
Can I freeze this recipe?
You can freeze apple pie. Once it has cooled completely, wrap it in a layer or two of plastic wrap, then aluminum foil, and freeze. Freeze for 2 to 3 months at most. Allow the pie to thaw overnight in the refrigerator before serving.