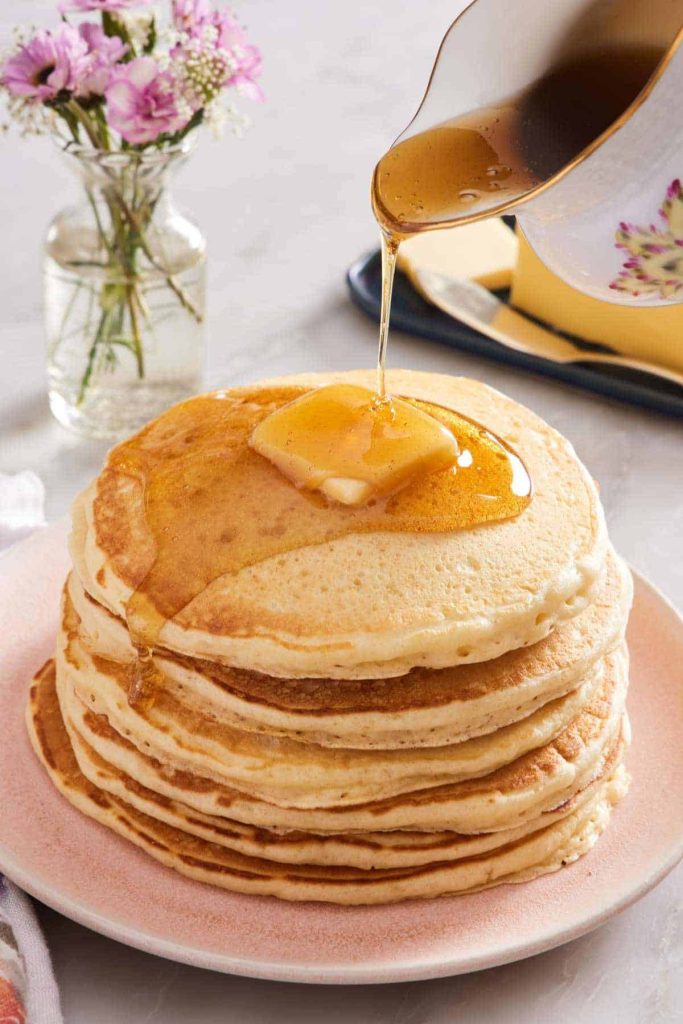
Start your day with a stack of fluffy Buttermilk Pancakes drizzled in warm maple syrup! This easy, pantry-based breakfast recipe is made with just a handful of basic ingredients and is perfectly primed for all your favorite mix-ins. Simply stir the batter together, and you are ready to cook!
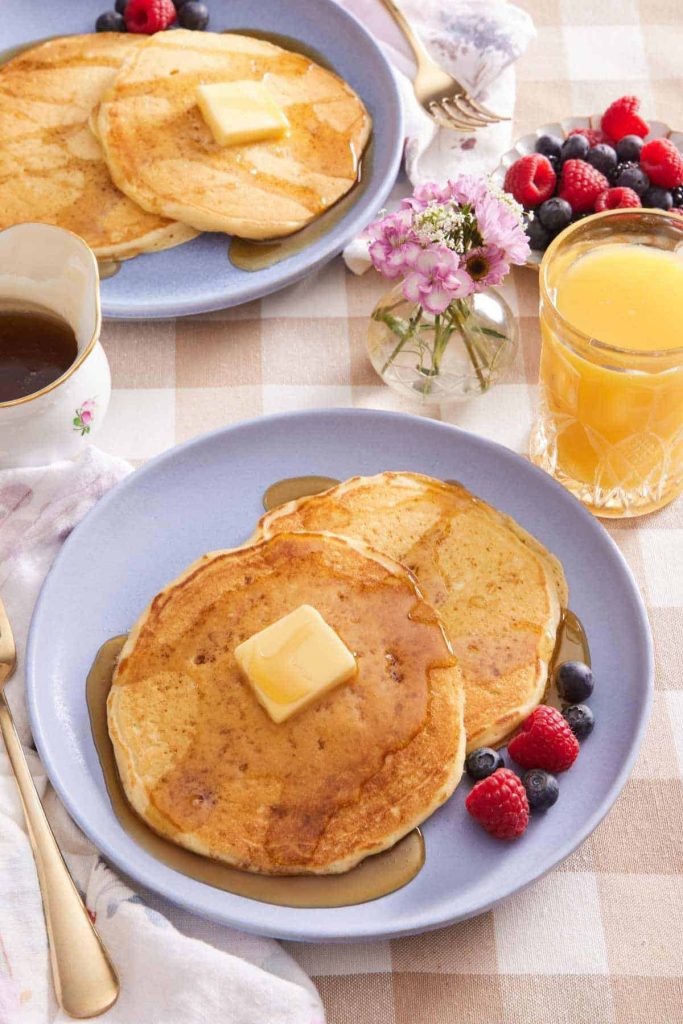
My boys love it when I whip up a batch of these homemade buttermilk pancakes for breakfast! Using tangy buttermilk not only infuses these flavorful flapjacks with a lovely flavor but also improves the leavening power of baking soda and softens the crumb for extra tender and incredibly fluffy pancakes.
This simple buttermilk pancake recipe is made with just a handful of pantry staples, and you can customize them with your own additions, such as fresh fruit or chocolate chips! They’re also great for meal prep—make a batch one morning and freeze them for an easy grab-and-go breakfast whenever you need it! For more pancake recipes, try my juicy blueberry pancakes, hearty whole wheat pancakes, and banana pancakes next!
Ingredients
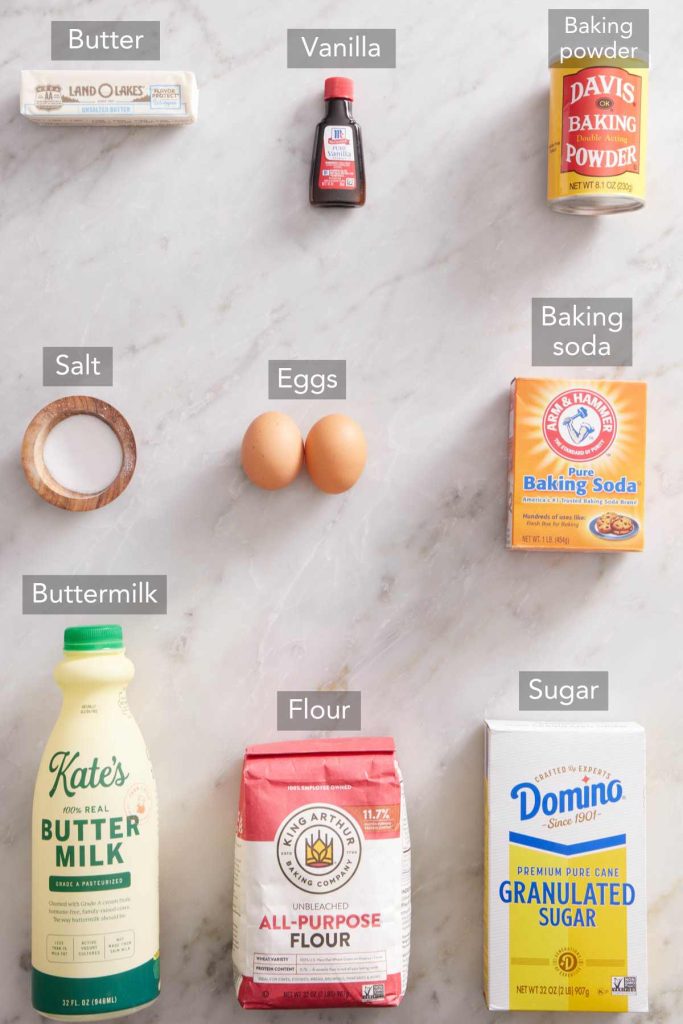
These key ingredients help make the best buttermilk pancakes! You can find the full list of ingredients in the buttermilk pancakes recipe card below.
Buttermilk — this cultured dairy product produces perfectly soft, fluffy pancakes! The acid in buttermilk will react with baking soda to produce lots of bubbles throughout.
Granulated sugar and salt — adding a touch of sugar helps caramelize the buttermilk pancakes to a deep golden brown, while sea salt amplifies the overall flavor.
Melted butter — using rich butter in the batter also helps produce a golden brown exterior. It’s also essential for pan-frying the batter, adding another layer of nutty flavor.
How To Make Buttermilk Pancakes
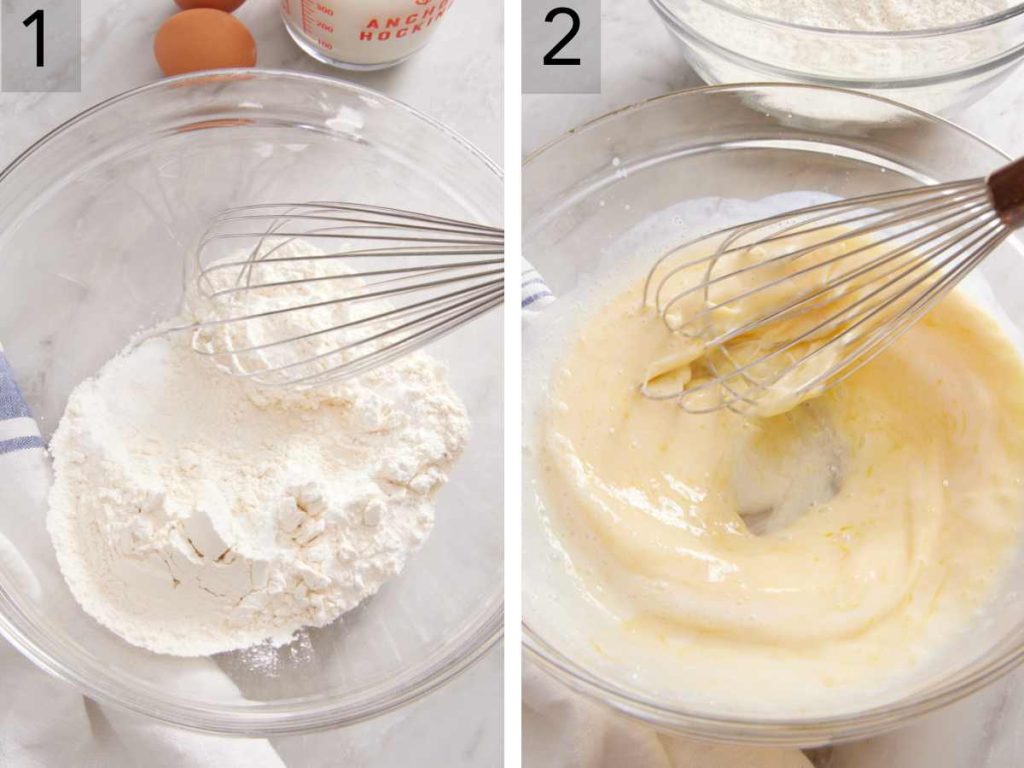
1. In a large bowl, whisk together the all-purpose flour and other dry ingredients.
2. In a separate mixing bowl, whisk together the wet ingredients.
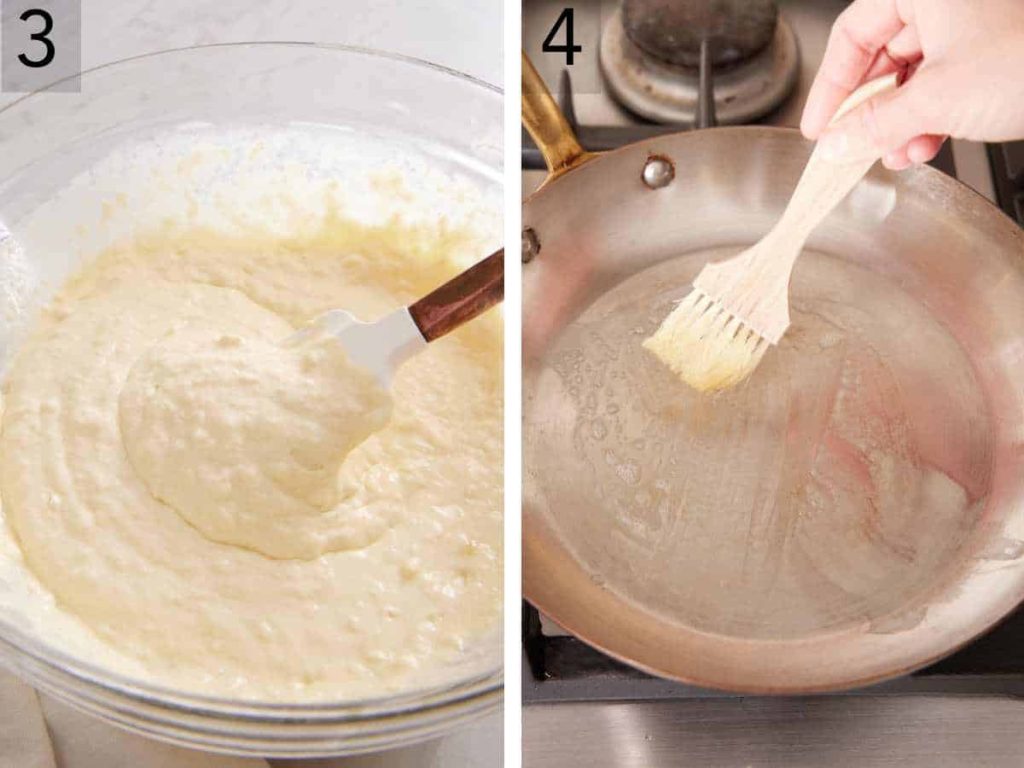
3. Mix the buttermilk mixture and butter into the dry ingredients until combined. It’s fine if there are some lumps!
4. Heat a skillet over medium heat and brush with melted butter.
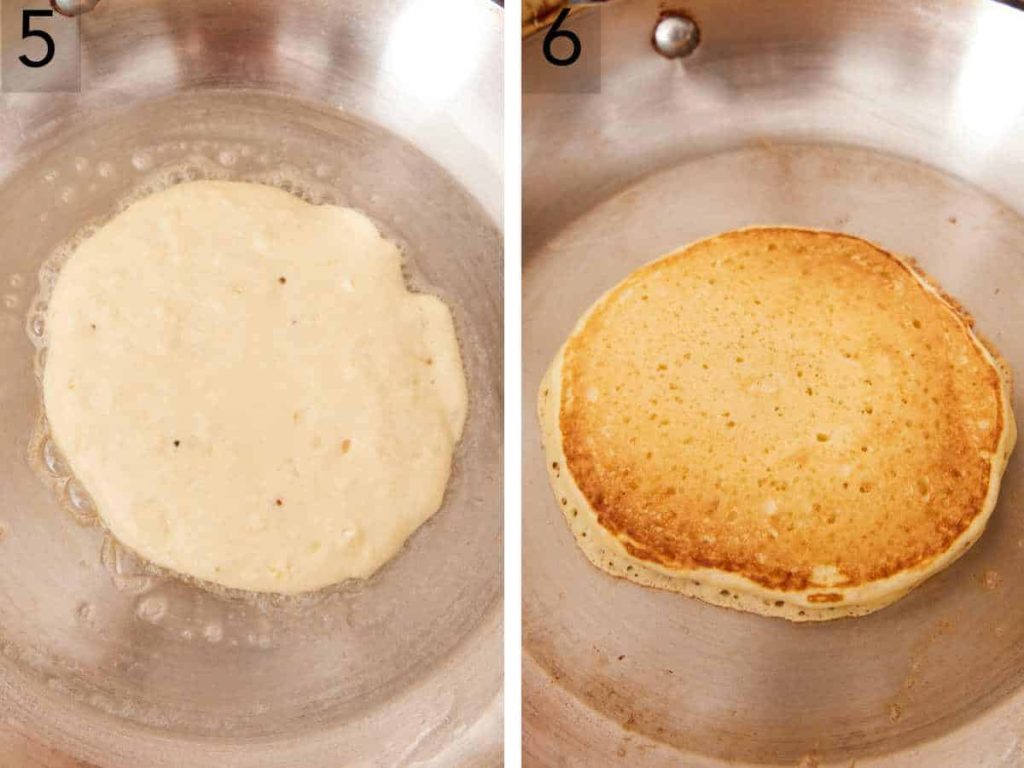
5. Pour in ¼ – ⅓ cup batter into the pan. Cook until you can see some bubbles forming on the surface and the bottom is golden brown.
6. Flip the pancakes and cook for another few minutes or until golden brown. Repeat with remaining batter, brushing with butter between pancakes as needed. Enjoy with a pad of butter and a drizzle of maple syrup.
Leave A Few Lumps In The Batter
While it might feel wrong, this actually results in fluffier homemade pancakes! I talk about this in my original pancake recipe as well to avoid tough and dense pancakes. You should stir the batter until the ingredients are combined so you don’t have any large streaks or pockets of flour, but if you see a few small lumps in the batter, leave them. If you continue stirring the batter until it’s completely smooth, you risk overworking it and increasing the gluten, causing your pancakes to bake up flatter, denser, and tougher.
Can I Use Sourdough Discard Instead Of Buttermilk?
Unfortunately, they’re not a great 1:1 substitute in this recipe. If you’d prefer to use discarded sourdough starter instead of tangy buttermilk, give my sourdough pancakes recipe a try!
Can I Add Mix-ins?
Absolutely! After pouring the batter into your preheated pan, feel free to add a handful of fresh or frozen blueberries, raspberries, chopped strawberries, mini chocolate chips, banana slices, or diced apples. You can also add extra seasoning to the batter itself—consider sprinkling in some cinnamon or pumpkin pie spice for warmth or some fresh lemon zest for brightness.
How To Store and Reheat Leftovers
Let leftover pancakes cool completely to room temperature. Place them on a wire rack in a single layer to cool, then transfer them to an airtight container using pieces of parchment paper to separate the layers. (Making sure they’re totally cool will prevent condensation from forming in the container and causing your pancakes to get soggy.) Refrigerate for up to 5 days.
Reheating: Pop a leftover pancake in the microwave for 30 seconds to 1 minute, in the toaster, or using an air fryer at 325°F for a few minutes.
How To Freeze Buttermilk Pancakes
For longer storage, stack cooled pancakes between pieces of parchment paper and transfer them to a zip-top freezer bag or a freezer container. They’ll freeze well for up to 3 months. Add an extra bit of reheating time as needed if cooking directly from frozen.
Pro Tips For The Best Buttermilk Pancakes
Once you stir the batter, let it rest while you heat the pan. This helps the flour to rehydrate, thickening the batter and resulting in fluffier pancakes. The baking soda, baking powder, and buttermilk will also start to react, forming bubbles and air pockets throughout. Resist the urge to stir it again, as it can deflate the batter.
Test the pan to see if it’s hot enough before brushing on the butter. Simply dribble a few drops of water into the pan—if they sputter and dance around, the pan is hot enough!
Use a nonstick pan or electric griddle if you have one! Using a nonstick pan is the best way to prevent pancakes from sticking, and it makes it much easier to flip the pancakes. If you’re cooking for a group (or you just want to knock out more pancakes at a time), the larger surface of an electric griddle is ideal.
Frequently Asked Questions
How do I know when pancakes are ready to flip?
You will see large bubbles form on the top throughout the pancakes, and the edges will look drier than they are in the center. Use a spatula to gently lift up an edge and check the coloring on the bottom side—it should be a rich golden brown.
What if I don’t have buttermilk?
It’s super easy to make a buttermilk substitute with regular milk and lemon juice or by thinning out yogurt, sour cream, or kefir. Learn how to make buttermilk with what you already have on hand!
Can I make buttermilk pancake batter ahead of time?
Yes, you can cover and refrigerate it for up to 12 hours—any longer than that, and you’ll lose out on all your leavening power. Alternatively, mix the dry ingredients and cover the bowl; then, when you’re ready to make the pancakes, whisk the wet ingredients together and stir them into your pancake mix!
If you’ve tried this Buttermilk Pancakes recipe, then don’t forget to rate it and let me know how you got on in the comments below. I love hearing from you!